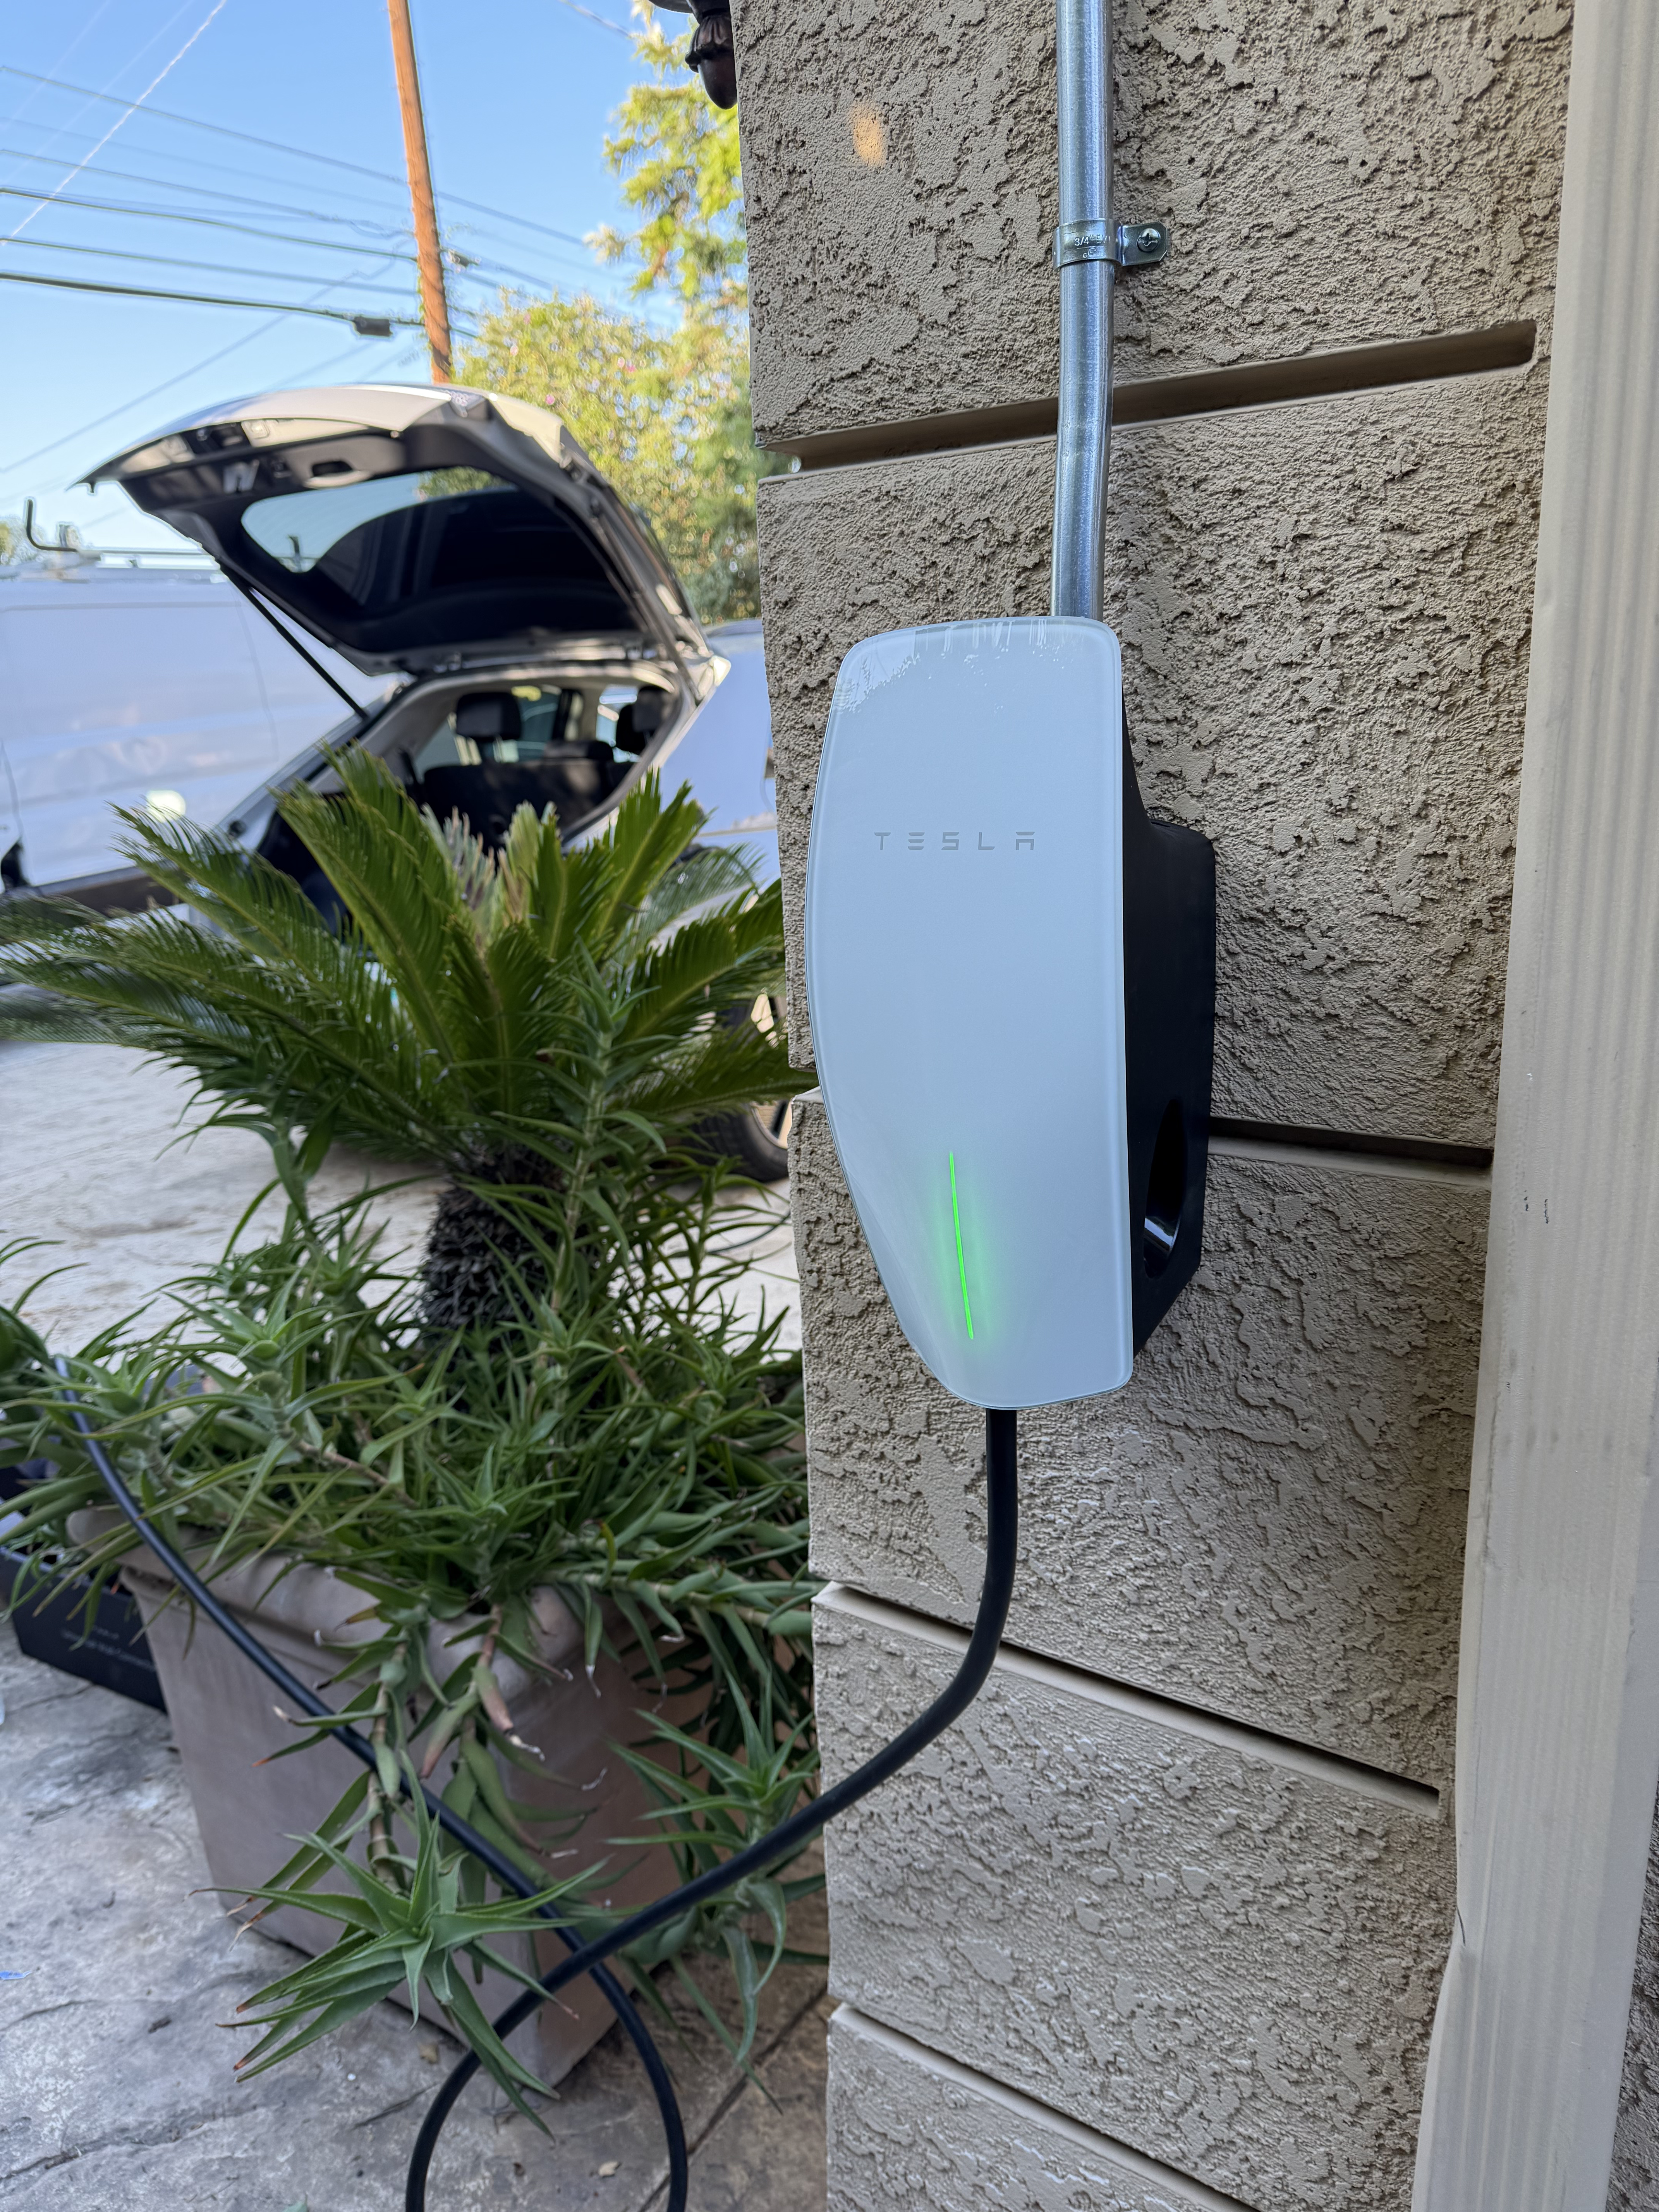
No other electrician in Los Angeles has published a complete, screenshot-by-screenshot walkthrough of the LADBS PermitLA portal. This guide covers every permit type for residential electrical work — EV charger circuits, panel upgrades, new branch circuits, and ADU electrical — with real screenshots from Jorge’s own license account showing exactly what you see at each step. Fee amounts are current as of 2026.
LADBS issues three types of permits for electrical work. The right type depends entirely on the scope of your project. Using the wrong type — or skipping the permit entirely — results in stop-work orders, fines, and required demolition of the work.
Have these ready before you open the PermitLA portal. The application takes 10 to 20 minutes from start to issued permit once you have everything in front of you.
Free city account at account.lacity.gov. Used across multiple LA city services. Takes under 2 minutes to create if you don’t have one.
Just the street number and street name. Example: 6641 Kester. No directional prefix (N, S) or suffix (Ave, Blvd). The portal searches its own address database.
If applying as a licensed contractor, have your C10 CSLB license number ready. It is verified against the state database during the application. Example: 1137497.
The City of Los Angeles Business Tax Registration Certificate number. Required if applying as a contractor doing work in the City. Displayed on your city business license.
One or two sentences describing exactly what will be installed. For an EV charger: “Install an electrical vehicle charger(s) in a single-family dwelling.” Keep it factual.
Payment is required to issue the permit. LADBS accepts major credit and debit cards through the portal. For EV charger permits, the total fee is $98.10.
Real screenshots from the LADBS PermitLA portal, pulled from Jorge’s own contractor account. These screenshots show the EV charger permit flow, which is the most common residential electrical Express Permit in Los Angeles.
Navigate to permitla.lacitydbs.org in any browser. You will land on the “Get Your Permit Online” page. A notice about the Angeleno Account system will appear — this is expected. The Angeleno Account is the City of Los Angeles single sign-on system that replaced the old username/password login. It is free to create and works across multiple city services. If you used the old PermitLA system, create your Angeleno Account using the same email address you used before.
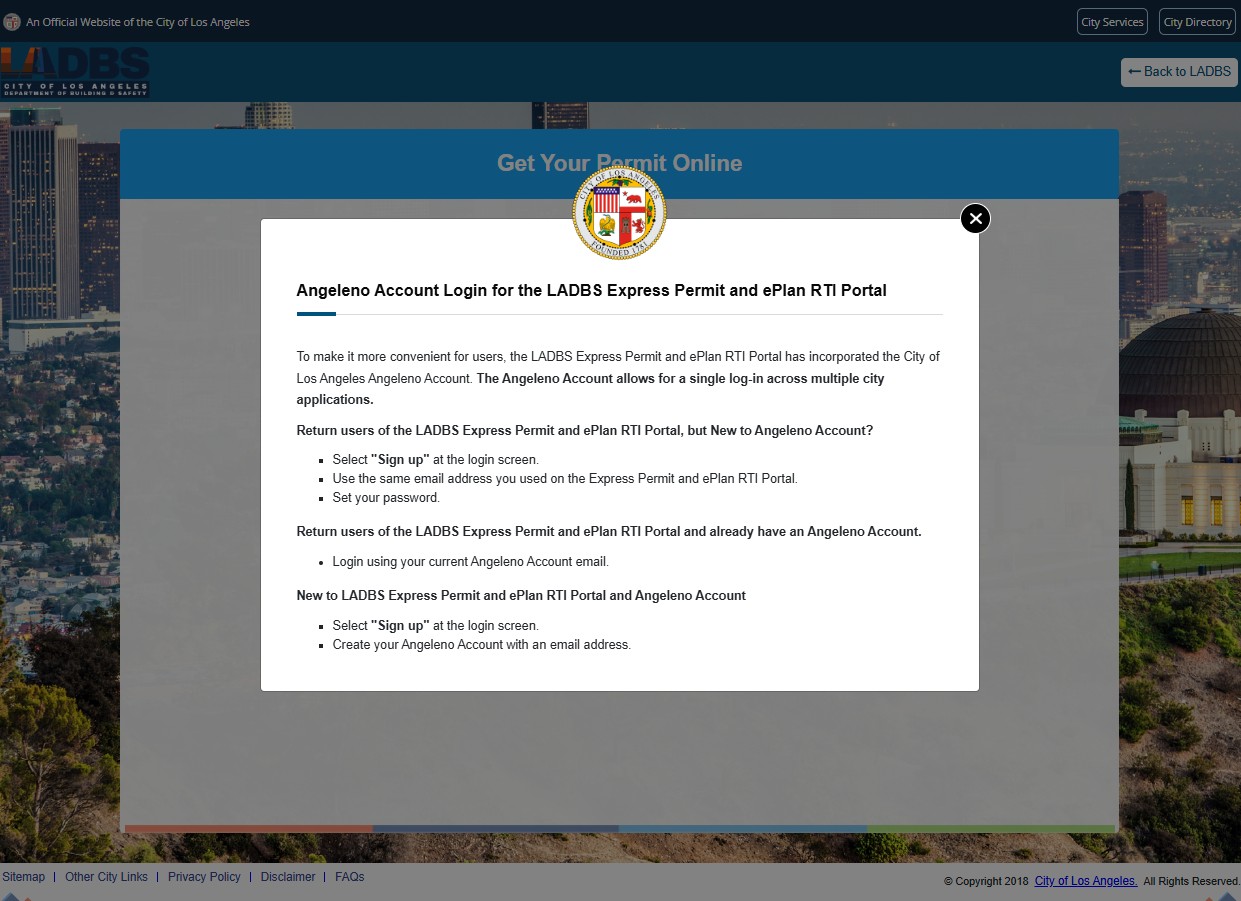
Click Sign in with Angeleno. You will be redirected to the City of Los Angeles login screen. Enter your email address and password. If you are new to the system, click Create an Angeleno Account — you will need to verify your email, then set a password. The whole process takes under 2 minutes. Once created, use those credentials for all future LADBS Express Permit applications.
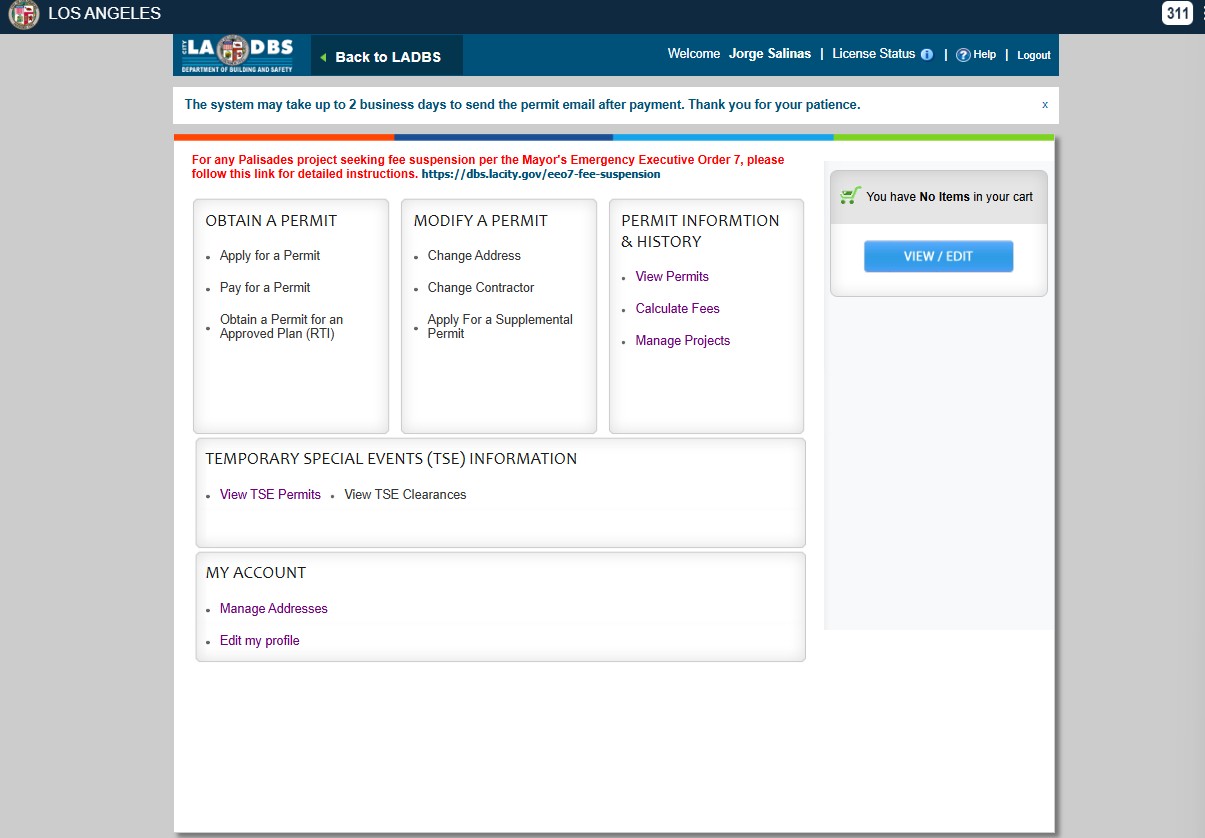
After login, you land on the PermitLA dashboard. The dashboard has three sections: Obtain a Permit, Modify a Permit, and Permit Information & History. Under Obtain a Permit, click Apply for a Permit. This starts a new permit application workflow. The navigation breadcrumb at the top of each subsequent screen shows where you are in the process: Search Address › Applicant Information › Project Selection › Permit Type › Certify Ownership › Work Description › Questionnaire › Scope of Work › Permit Fees Review › Declaration › Permit Cart Review.
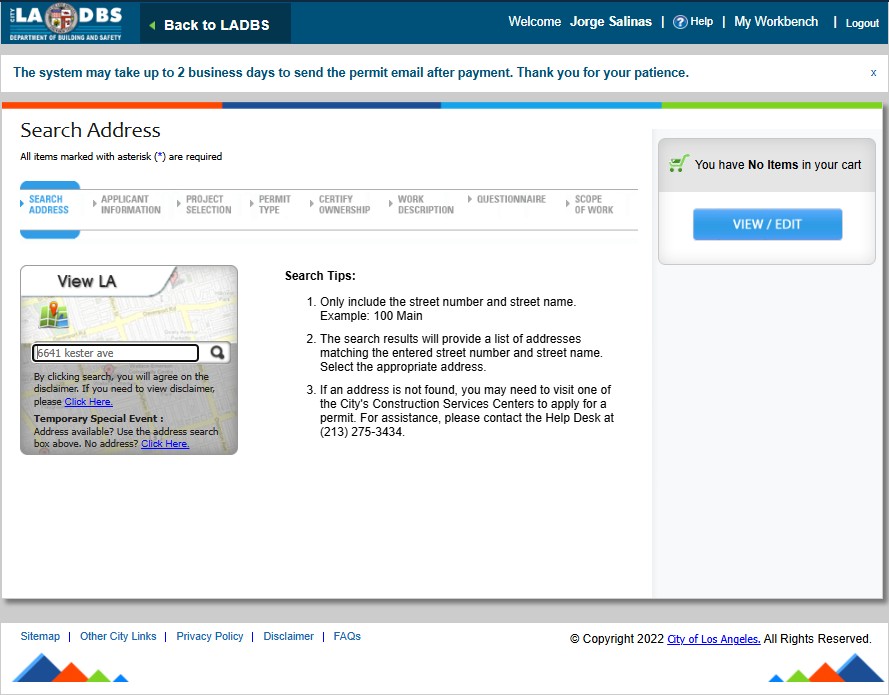
Enter the property street number and street name in the search box. Do not include directional prefixes (N, S, E, W) or street suffixes (Ave, St, Blvd). The portal searches its own address database and will show matching results. For 6641 N Kester Ave, enter 6641 Kester. Select the correct address from the results list. If the address does not appear, call the LADBS Help Desk at (213) 275-3434 — some newly constructed addresses or properties with recent lot splits may need in-person processing.
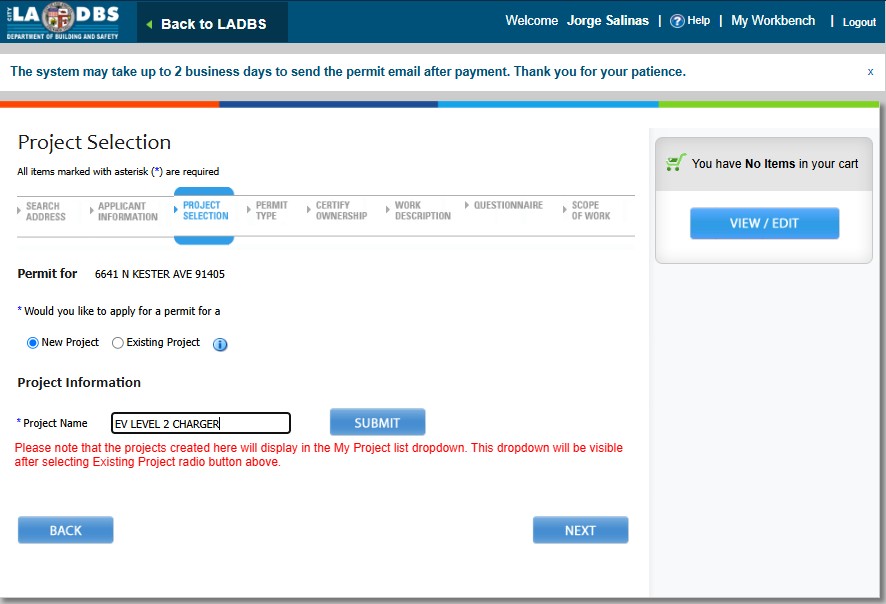
The Applicant Information screen captures who is applying: Contractor (requires C10 license number and BTRC number) or Owner (for owner-builder permits). If applying as a contractor, your license is verified live against the CSLB database. After applicant info, the Project Selection screen asks whether this is a New Project or an Existing Project. Choose New Project. Give the project a clear name — for example, EV LEVEL 2 CHARGER or 200A PANEL UPGRADE. Click Submit, then Next.
The Permit Type screen lists all available permit categories. Select Electrical. You will then be asked to choose the permit sub-category. For EV charger circuits, NEMA outlets, and simple receptacle or fixture work, select Express Permit (no plan check, issued instantly online). For panel upgrades, new subpanels, or solar interconnection, select Counter Plan Check Electrical — those require an in-person appointment at the LADBS Construction Services Center at 201 N Figueroa St. A licensed C10 electrician can handle the Counter Plan Check application on your behalf.
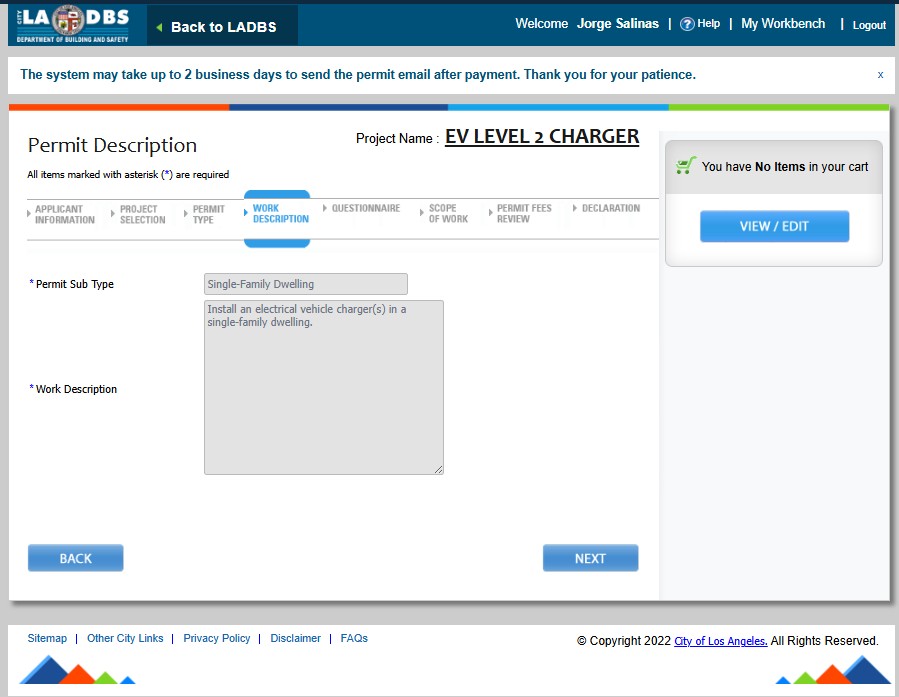
The Work Description screen has two fields. Permit Sub Type: choose the occupancy type for the property — Single-Family Dwelling for a house, Multi-Family for apartments/condos. Work Description: enter a brief, factual description of the electrical work to be performed. For an EV charger: “Install an electrical vehicle charger(s) in a single-family dwelling.” Keep it concise and accurate. Exaggerating scope can push the application into a plan-check category and delay the permit. Click Next to continue through the Questionnaire and Scope of Work screens.
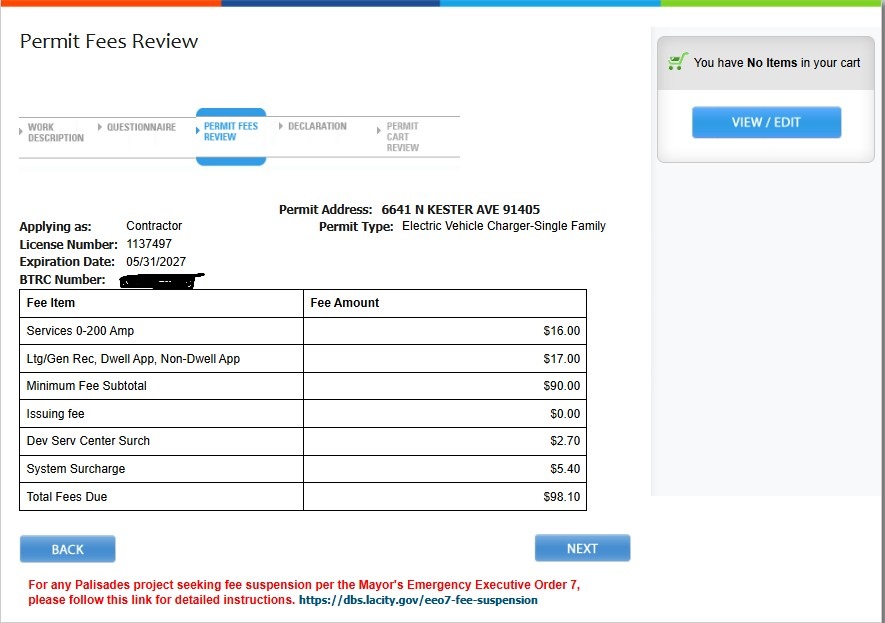
The Permit Fees Review screen shows the itemized fee breakdown calculated automatically by the system based on your project type and property service size. Review the line items carefully — the permit type and address are displayed at the top of the screen. If anything looks wrong, click Back to correct it before paying. Once you click Next to proceed to Declaration and then Permit Cart Review, you will be prompted to pay by credit or debit card. The permit is issued immediately upon successful payment. Download the PDF right away. A copy will also be emailed to you, though LADBS advises allowing up to 2 business days for the email to arrive.
After payment, the permit PDF is available for immediate download from the portal. California Building Code requires the permit to be posted visibly at the job site before any work begins. Print the permit and tape it to a window or wall near where the work will be performed. The LADBS inspector will look for the posted permit when they arrive for the final inspection. Do not begin any electrical work until the permit is in hand and posted. Keep the permit until the final inspection is signed off and closed.
Fees shown below are based on actual permit applications pulled through the LADBS PermitLA portal in 2026. Fees vary by service size (amperage) and project type. The system calculates them automatically — no guessing required.
| Fee Item | Amount |
|---|---|
| Services 0–200 Amp | $16.00 |
| Ltg/Gen Rec, Dwell App, Non-Dwell App | $17.00 |
| Minimum Fee Subtotal | $90.00 |
| Issuing Fee | $0.00 |
| Dev Serv Center Surcharge | $2.70 |
| System Surcharge | $5.40 |
| Total Fees Due | $98.10 |
Source: LADBS PermitLA portal — Permit Type: Electric Vehicle Charger–Single Family — 0–200A service — 2026
The LADBS permit fee covers the permit issuance and the required LADBS inspection. It does not include contractor labor, materials, or panel upgrade fees (which have a separate permit). Counter Plan Check permits and Regular Plan Check permits have different fee schedules.
LADBS offers a free online fee calculator at ladbsservices2.lacity.org under “Pay a Permit / Plan Check Fee.” You can also call LADBS at (213) 482-7077 during business hours.
Getting the permit is step one. California law requires a final inspection by an LADBS electrical inspector before the permit is closed and the work is considered complete and legal.
Print and post the issued permit visibly on-site before any work begins. The inspector will look for it. California law prohibits starting work without the posted permit.
The licensed C10 electrician performs the installation. All work must comply with the California Electrical Code (CEC), NEC Article 625 for EV chargers, and the LADBS-approved scope on the permit.
Schedule through the LADBS portal at ladbsservices2.lacity.org or call (888) 524-2845. Use your 15-digit permit number. Inspections are available Monday through Friday.
The LADBS electrical inspector reviews the work. For EV charger permits, the inspector verifies the circuit size, breaker rating, wire gauge, connection method, and that the charger is installed per manufacturer specs and NEC Article 625.
After a passing inspection, the LADBS inspector signs off and the permit is closed in the system. The work is now legal, documented in city records, and disclosed to future buyers if you sell the property.
When you hire LED Guys for any permitted electrical work, Jorge handles the entire permit process from start to final inspection sign-off. This includes:
Pulling the Express Permit through PermitLA on the day of the job quote (typically same day or next day). Completing all LADBS paperwork. Being on-site or on-call during the LADBS inspection. Addressing any corrections the inspector requests before closing.
No homeowner needs to log in to any portal, take time off work, or deal with LADBS directly. Jorge handles it as part of every permitted installation.
LED Guys is a C10 licensed electrical contractor based in Van Nuys, serving all of Los Angeles and the San Fernando Valley. Jorge handles the full permit process — Express Permits online same day, Counter Plan Check permits for panel upgrades, and final inspection sign-off. Written quote on every job. No overtime charges.
The Tesla Energy Certified Installer designation identifies professionals who have completed Tesla Energy training, hold deep technical knowledge of Tesla Energy products, and deliver the highest-quality installations for Tesla customers. LED Guys holds this certification for both product lines — a combination very few Los Angeles electricians can offer.
LED Guys is certified by Tesla Energy to install the Tesla Wall Connector and Universal Wall Connector to Tesla's own installation standards. That certification covers the full scope of a residential or commercial Wall Connector project: conductor sizing per NEC Article 625, dedicated circuit breaker selection, conduit and wire routing, GFCI breaker protection per NEC 625.54, and proper grounding and bonding at the panel.
After the physical installation, Jorge commissions the Wall Connector through the Tesla One app — connecting the unit to Wi-Fi, registering it to your Tesla account, setting the output amperage to match your circuit, and configuring access controls if you want to restrict charging to authorized vehicles. For multi-vehicle homes and commercial sites, we configure Power Sharing so up to six Wall Connectors intelligently share a single circuit without exceeding its capacity.
The Wall Connector delivers up to 48 amps on a 60-amp circuit, the fastest Level 2 charging Tesla offers for home use. Its built-in amperage adjustment (12, 16, 24, 32, 40, or 48 amps) means it works with any panel — from a 100-amp service with limited headroom to a 400-amp commercial main. Tesla's NACS connector is now the North American charging standard (SAE J3400), so the Wall Connector charges Teslas natively and other EV brands via adapter or native NACS port. The Universal Wall Connector adds a built-in J1772 connector for households with mixed EV brands.
Certified for Tesla Powerwall home battery installations — whole-home backup, Backup Gateway integration, solar coordination, and Charge on Solar setup so your Tesla charges from excess solar production automatically.
Powerwall installations include gateway wiring, backup circuit selection based on your household's critical loads, and utility interconnection paperwork for LADWP net metering. Jorge configures Storm Watch, self-consumption mode, and time-based control through the Tesla app so your system responds automatically to grid conditions and rate schedules.
LED Guys is a GlowbackLED Trusted Lighting Installer — a designation earned by electrical contractors who consistently deliver high-quality installations of GlowbackLED's custom LED lighting systems. GlowbackLED is a US-based designer and manufacturer of architectural LED solutions: custom LED panels, recessed and pendant linear fixtures, LED aluminum channels, and cabinet lighting built to specification for high-end residential and commercial projects.
When a project calls for custom-fabricated LED lighting — a coffered ceiling with built-in linear channels, back-lit niches, under-cabinet strip lighting with dimmer controls, or a commercial lobby with signature pendant fixtures — Jorge sources components from GlowbackLED and installs them to their technical specifications. Every GlowbackLED installation includes proper driver placement, dimmer compatibility verification, and clean concealed wiring so the finished result matches the design intent.